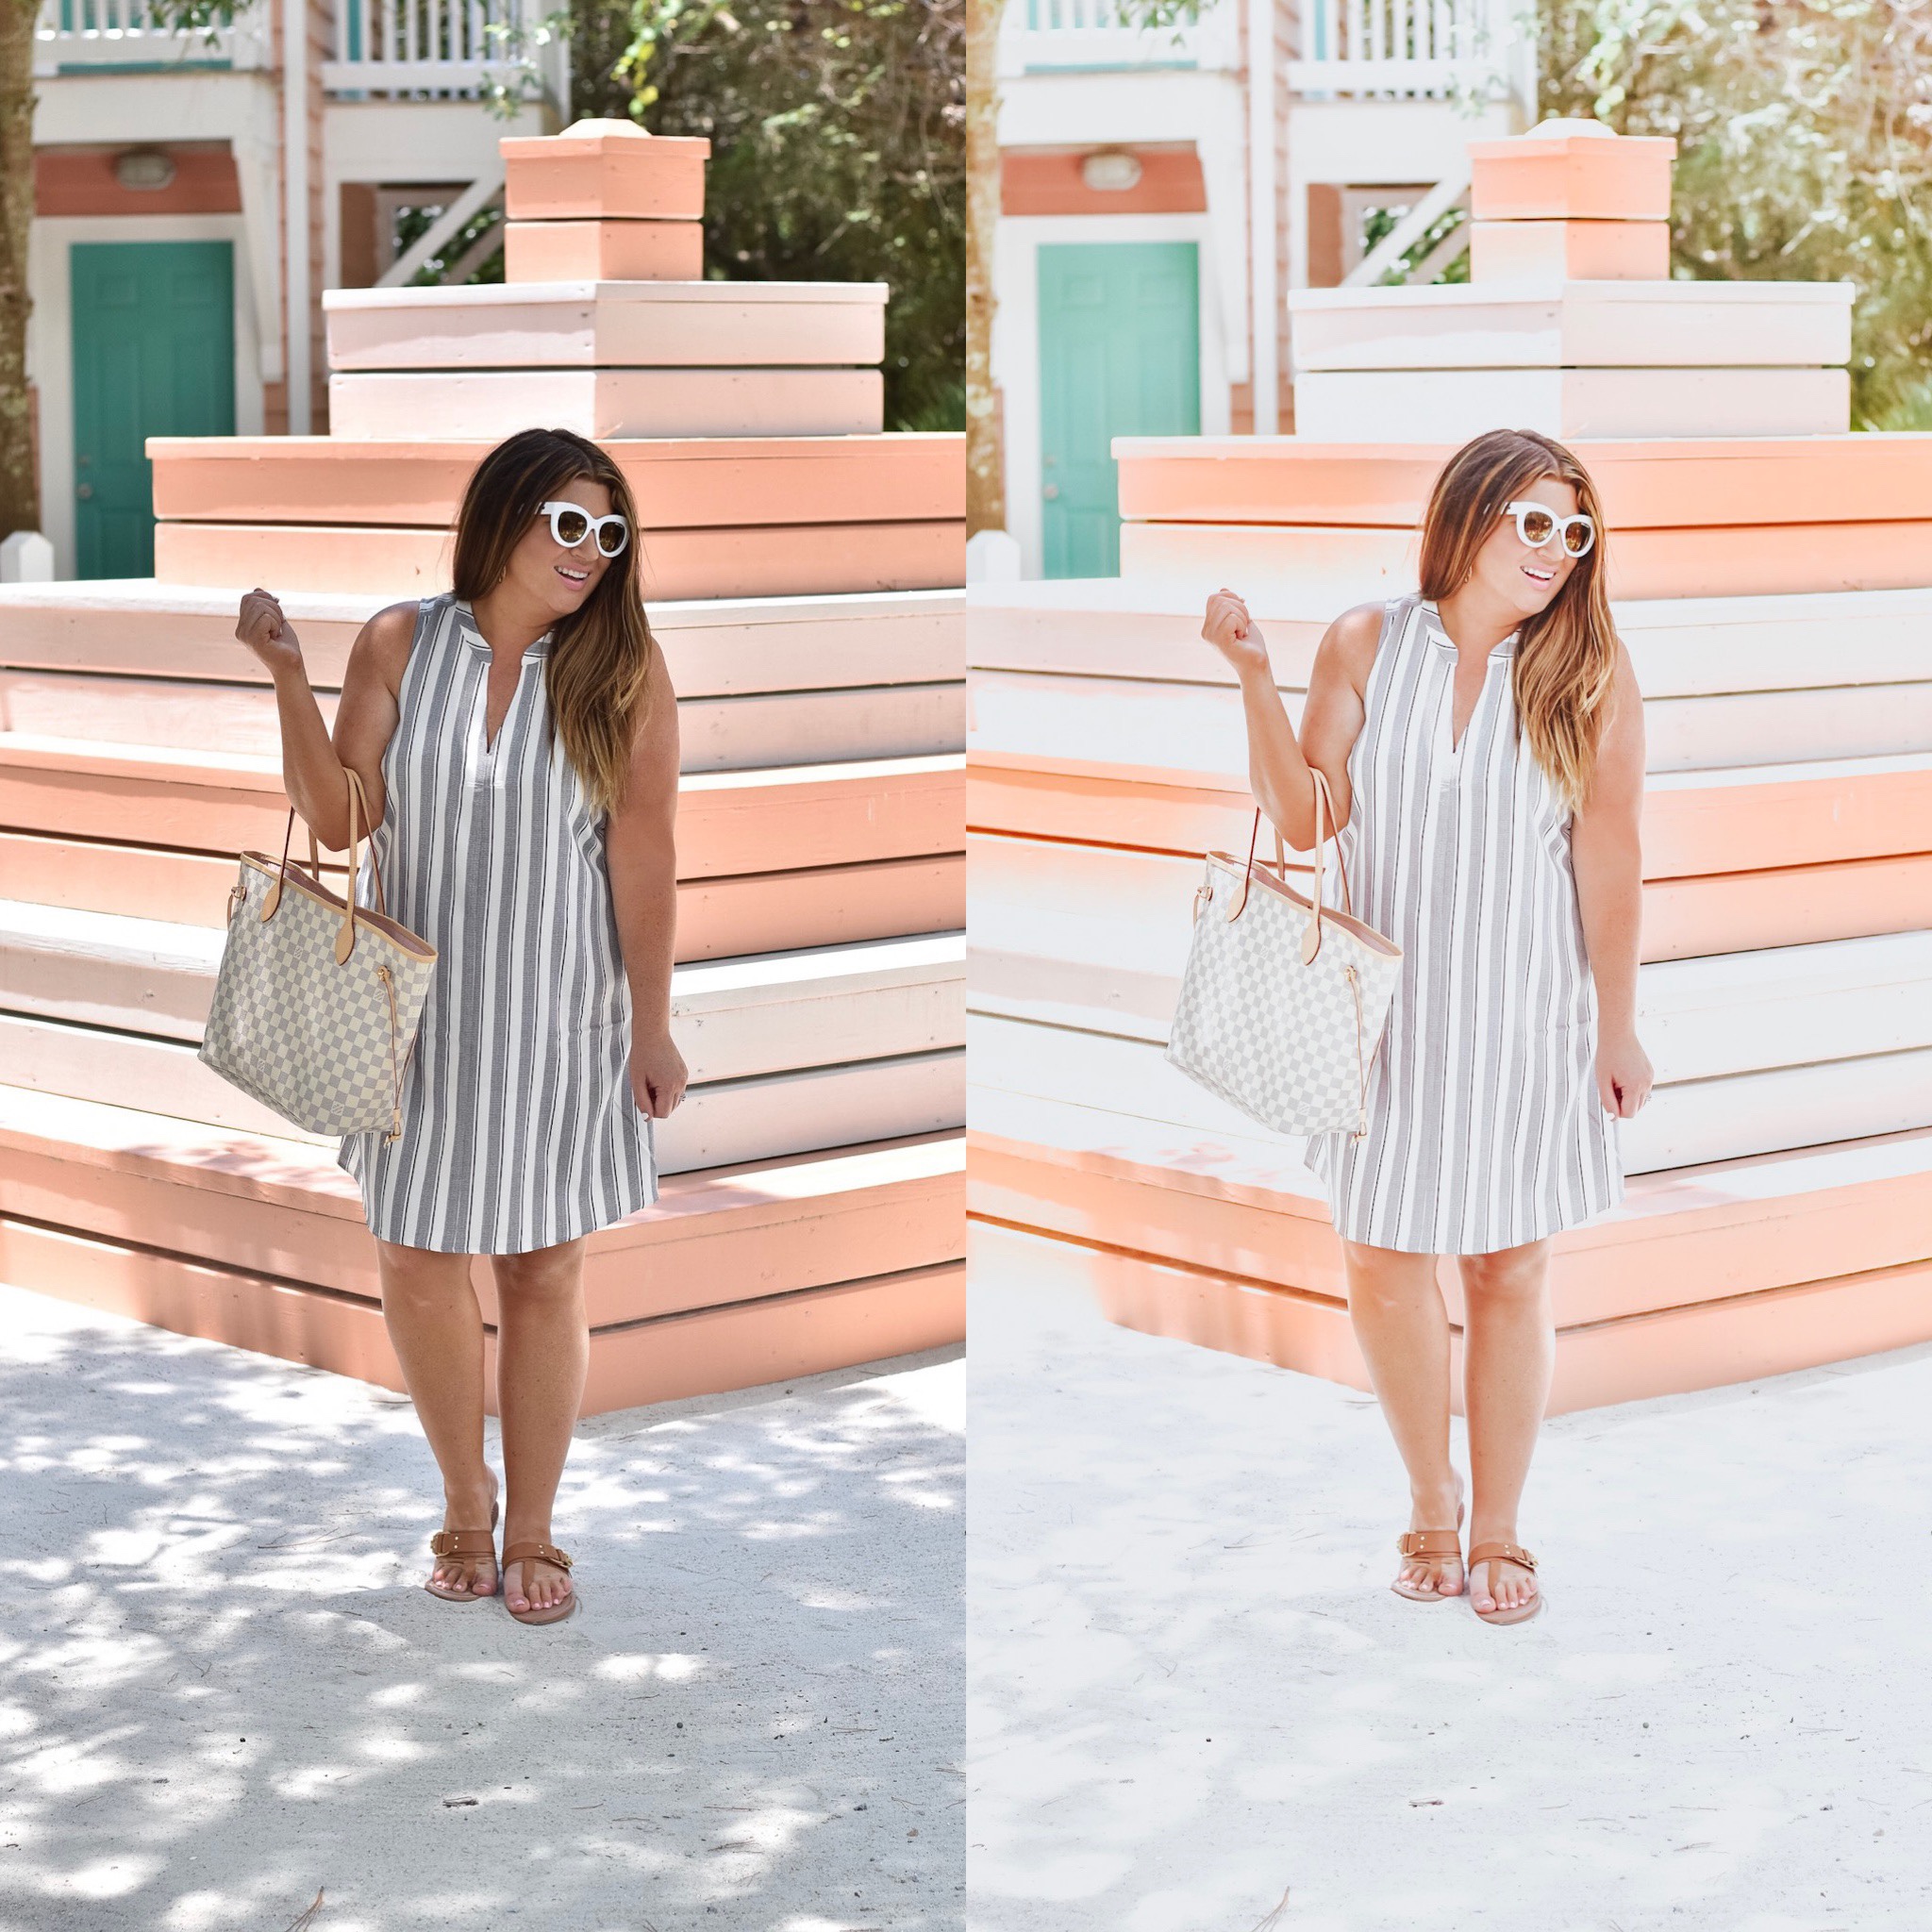
Here we go, friends and mamas! This is all about Lightroom presets! Once you’ve purchased your shiny new 30A Mama Presets, you’re ready to put them to use and start creating your most beautiful life! I’m with you all the way and so excited to see your pretty pictures come alive!
Be sure to tag #30amama and @jamiray when you share!
A few quick things to note… These presets have been designed and tested on a variety of images and tweaked to perfection for that bright, happy and beachy look that I love to capture in my own images. Whether you’re a Lightroom beginner or a pro, they’re super easy to use and can be adjusted to your image to give you a lovely finished product that creates a cohesive feed, adds consistency to your visual presence and boosts your photo game with a few simple clicks. Sounds fabulous, right?
Since all images are not created in the same lighting, setting or conditions, keep in mind that the end result can vary depending on factors like color, contrast, shadows, exposure and other camera settings. It takes a bit of practice to find your photography style and for me, I generally avoid dark backdrops, low lighting and artificial light. I’ll show you how to tweak once you’ve applied the preset (so be sure to scroll all the way down below), but remember that starting with your best scene or setup will yield the best result. If you ever need help with specific adjustments beyond what I share below, I’m happy to help!
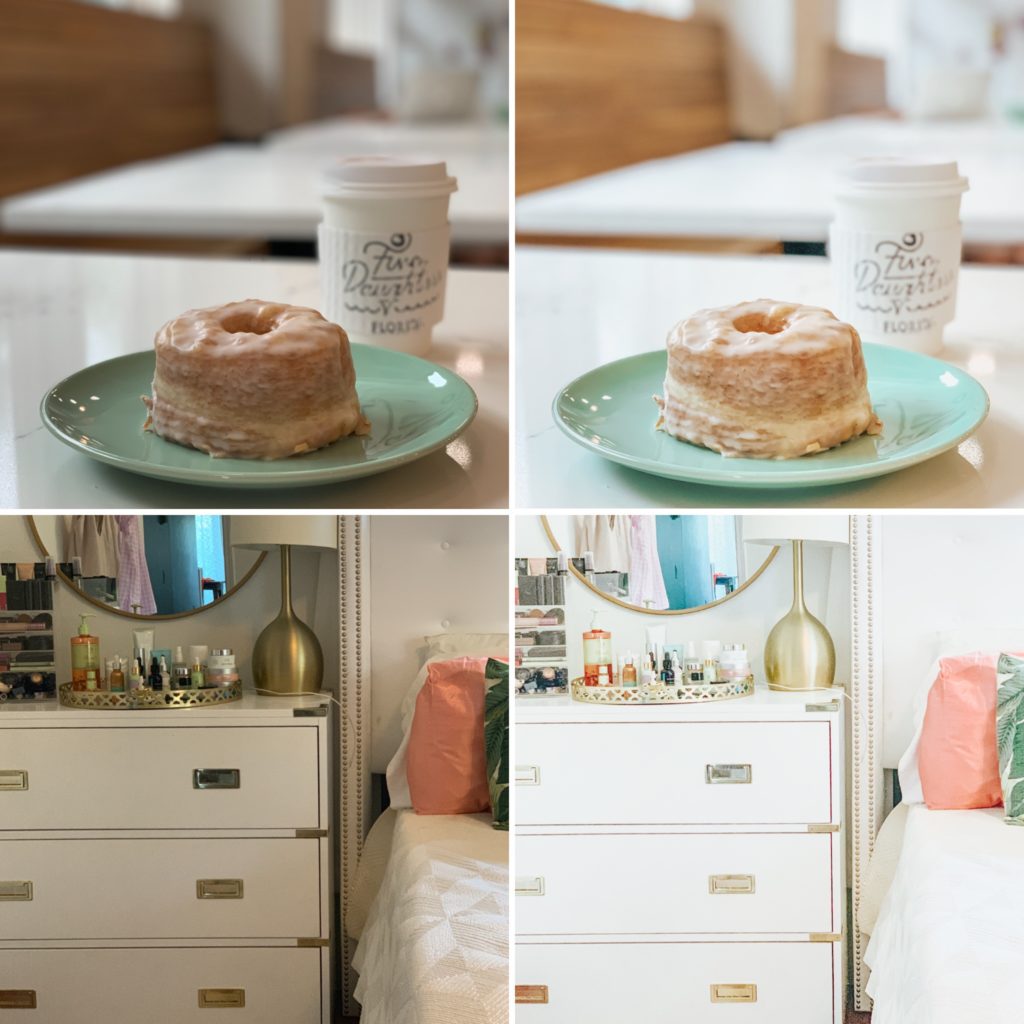
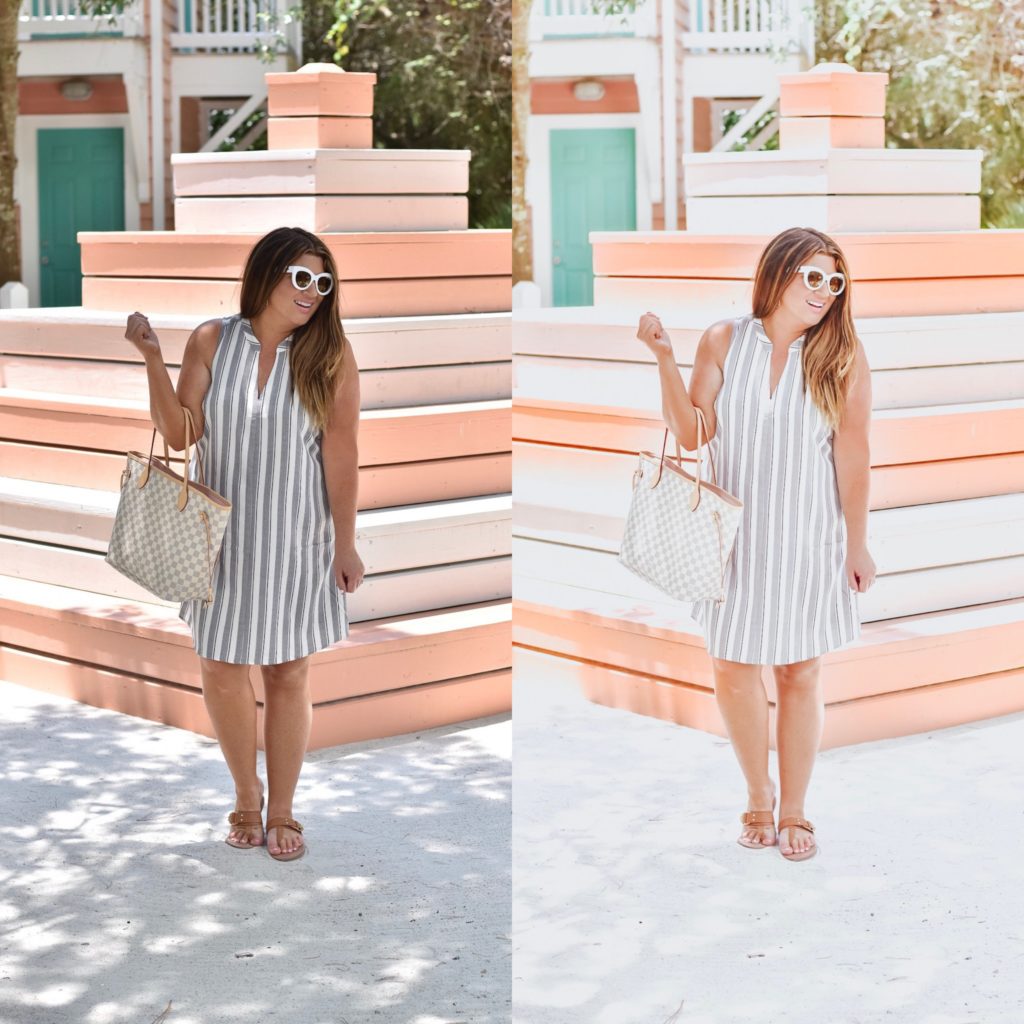
Installing in Lightroom Mobile
1. 30A Mama Preset purchases generate an automatic download link with a digital file folder. You can do this step from a computer or mobile phone, whichever is easier for you. For mobile, save each of the 6 preset images to your device. Tap each file name to view the .dng image file, then hold down on the image to save to camera roll. saving the preset .dng file directly to your mobile device. Let me know if you have any questions or need help for this part!
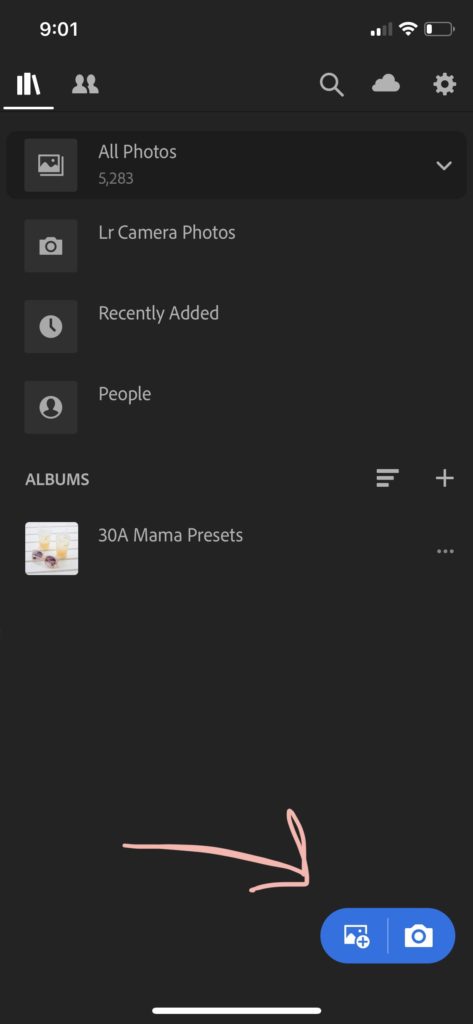
2. Open Lightroom Mobile app (If you don’t currently have this and are just beginning your preset journey, download and register now.) and click the blue “add photo” icon at the bottom. Select the .dng preset file you saved to your device.
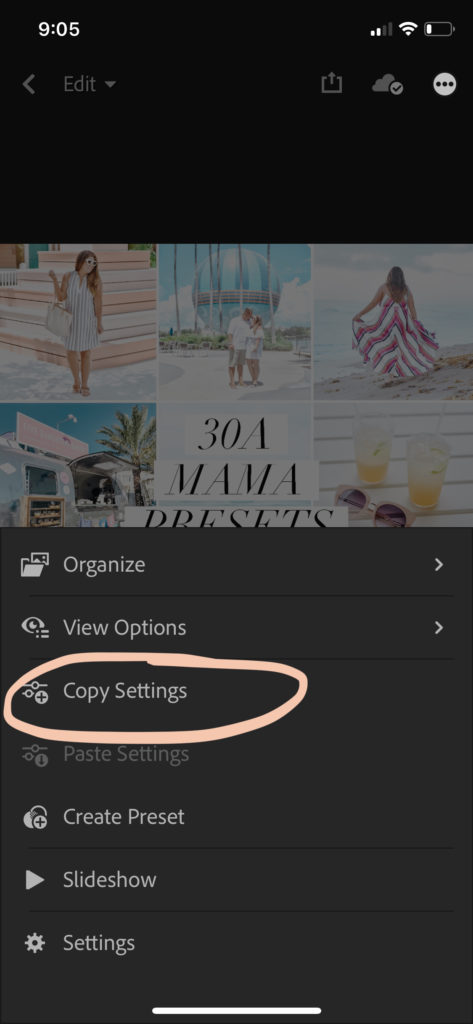
3. In the “All Photos” screen, tap the preset file thumbnail image to open it. Click the three dots (…) option in the upper right corner.
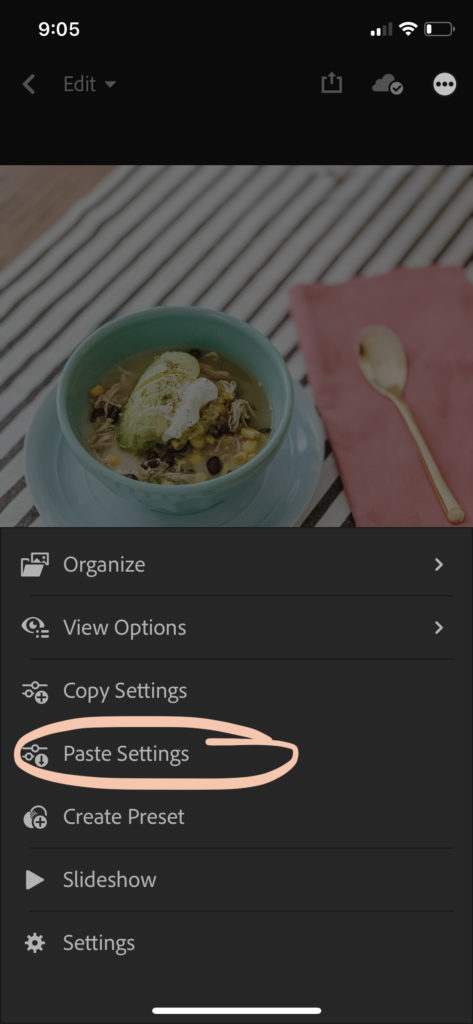
4. (Option 1) Select Copy Settings and make sure all variables are checked before clicking OK. Go back to All Photos and select or import the photo you want to add the preset to. Click the three dots (…) option and select Paste Settings.
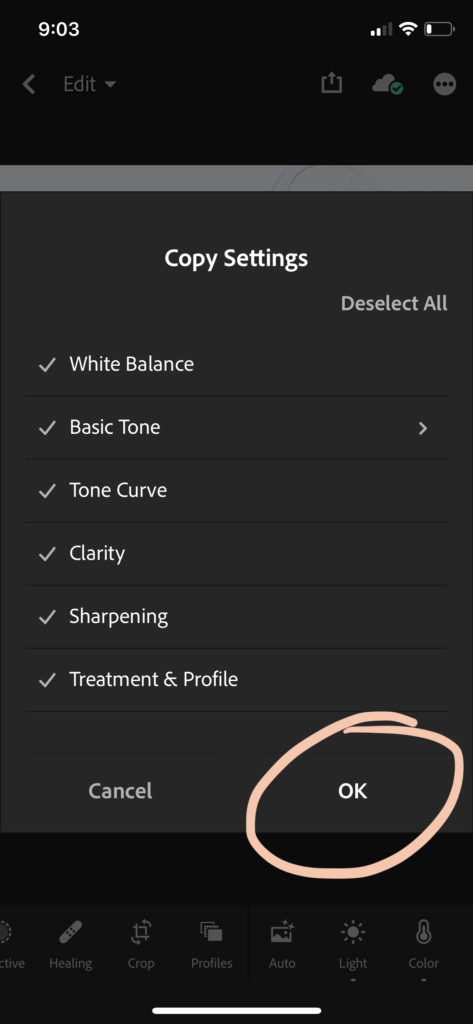
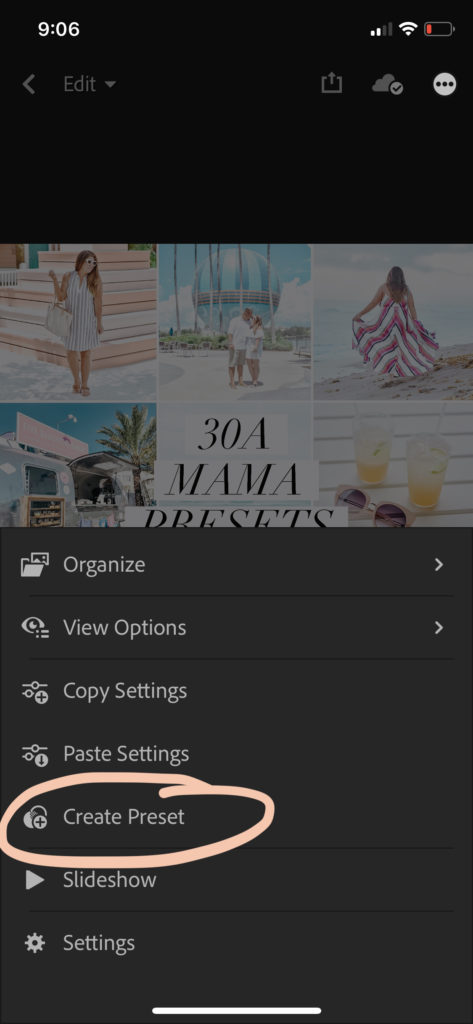
4. (Option 2) Select Create Preset and make sure all variables are checked before clicking OK. Go back to All Photos and select or import the photo you want to add the preset to. Scroll along the bottom menu to Presets and simply tap the preset of your choice and click the check mark.
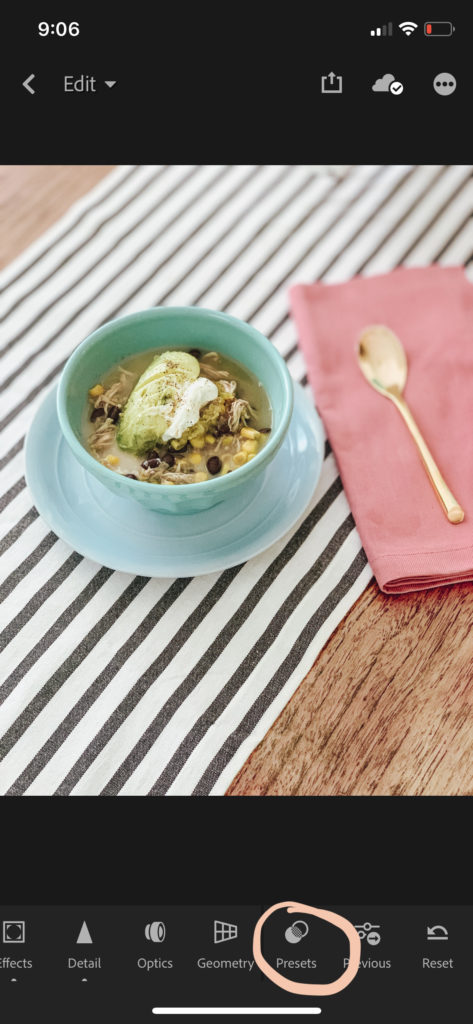
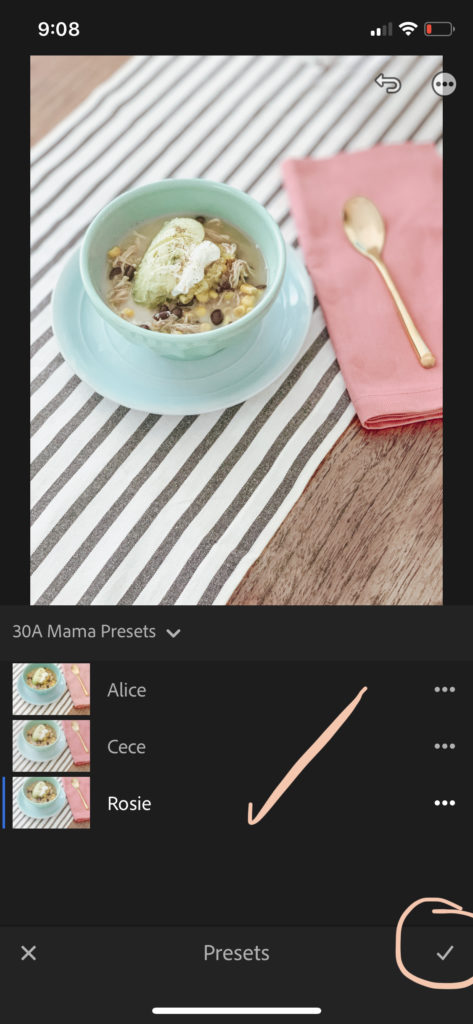
5. From here, you can tweak settings to best fit the conditions of your image.
Installing in Lightroom CC Desktop
1. 30A Mama Preset purchases generate an automatic download link with a digital file folder. You can do this step from a computer or mobile phone, whichever is easier for you. Download and save each of the 6 preset images to your desktop in the folder of your choice.
2. Open Lightroom CC on your computer.
3. In the Preset tab, click the plus icon (+) to import presets. Navigate to where you saved the .xmp files to select each .xmp file and click import.
4. These are now saved within the program and ready to use! Select or import the photo you want to add the preset to and simply hover over the preset to preview the adjustments or click the preset to apply.
5. From here, you can tweak settings to best fit the conditions of your image.
Image Adjustments
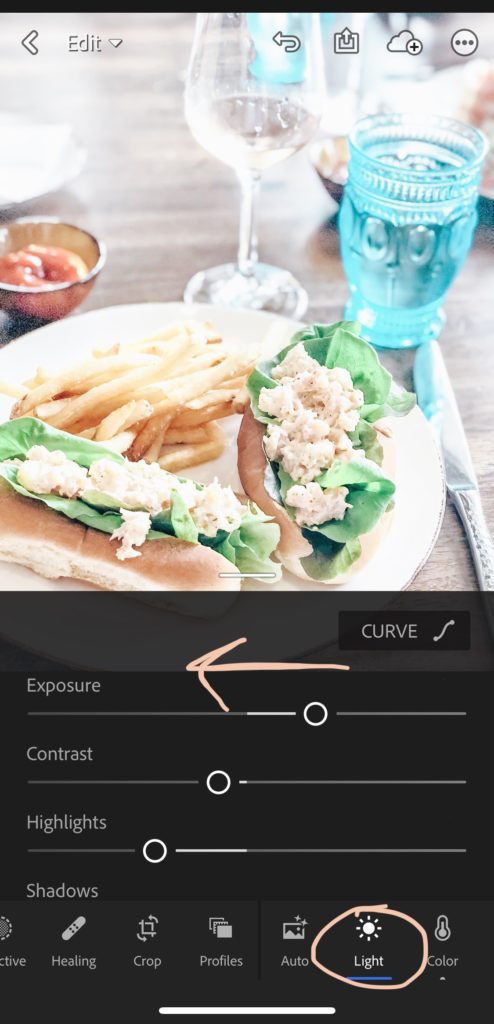
Too Bright? Scroll along the bottom menu to Light and adjust the Exposure slider left for less brightness and right for more brightness. If shadows appear too grainy or washed out, adjust the Shadows or Blacks sliders left for darker tones.
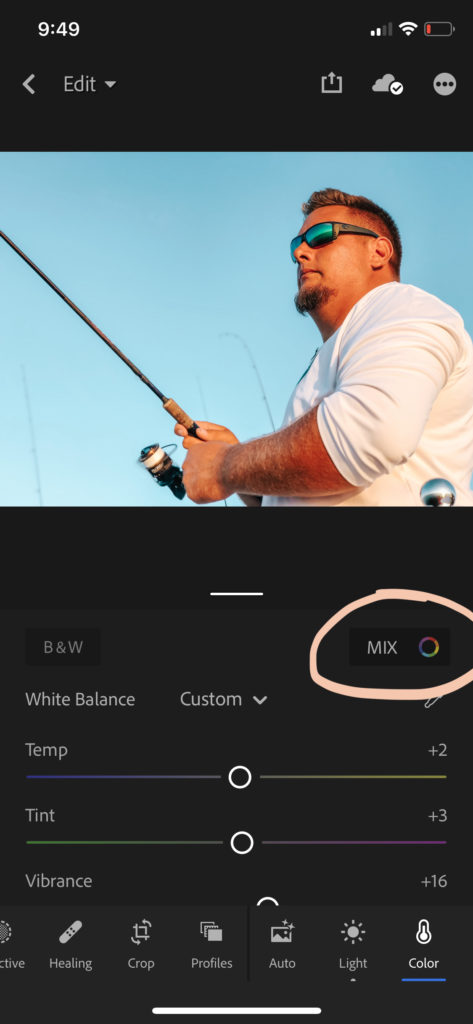
Color Tweaks? Scroll along the bottom menu to Color and tap Mix in the upper right corner above the sliders. Make slight adjustments to the Hue, Saturation and Luminance of each tone. For example the blue may need need to slide slightly back to the middle if you prefer a less turquoise blue. For a more bronzed skin tone, select orange and adjust the Luminance slightly to the left and the Saturation slightly to the left.
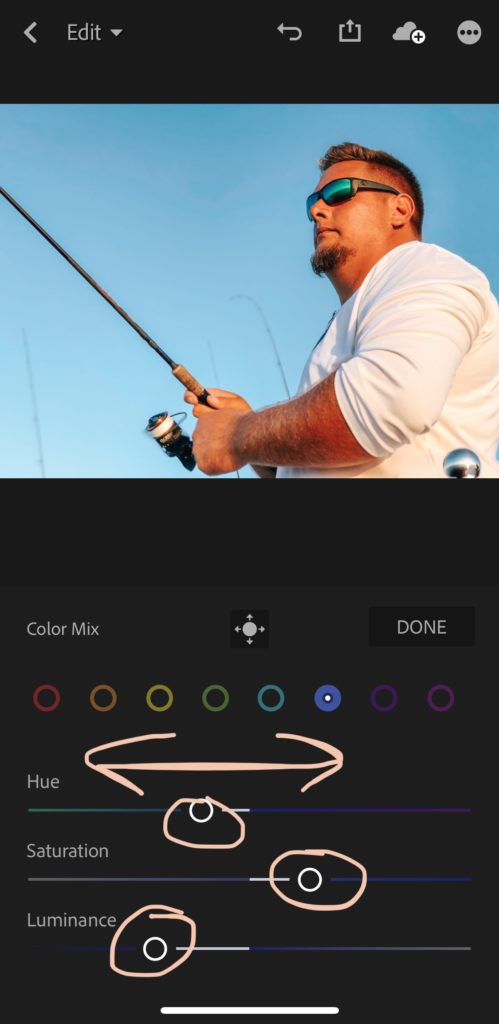
Too Sharp? Scroll along the bottom menu to Detail and adjust the Sharpening slider or Detail slider slightly to the left. Scroll along the bottom menu to Effects and adjust the Clarity slider slightly to the left for more softness or to the right for more texture and detail.
These are just a few quick adjustments you can make, but really the possibilities are endless. I’d love to see what you do with your images using the 30A Mama preset. Be sure to tag #30amama and @jamiray when you share!
Fine Print: 30A Mama Presets are sold as final sale with a single download allowed. Because this is a digital product, no refunds or returns are possible once a sale is made. Sharing, redistributing or otherwise deriving similar products from this specific preset are strictly prohibited.

